Friday, October 11, 2013

Building of wooden frame and old ammo box seats.

   The framework I made from old oak planks that I bought from an old saw mill in Ledyard .  The wood is as old as the tractor.  I would like to mention an interesting point.  Back in the 1940's when my father built the tractor, he went to that same old saw mill and bought from the owner the LaSalle rear end and transmission that is now in the tractor.  60 years later I'm there buying wood for the same tractor.  The planks looked great after I cut them to size, drilled for bolts, carefully sanded not to remove old saw blade marks and the "old look".  Lots of charm still in the wood!  I then sealed and put on three coats of marine polyurethane.                                                                                                                            
   
                                                       how they looked from saw mill.
                                                             cut and sanded to size

                       The planks were all installed (except the back one is missing in photo) exactly where my father bolted them down. the only difference, he used carriage bolts and I used bolts with nuts and washers and I countersunk each so the heads were all flush.


                       after everything was fitted, I disassembled and sealed and polyurethaned.
                                              now onto the wooden ammo box seats.

        The seats were old wooden ammo boxes.  If you go back to the first photo of the blog with my father on the red flyer you will see he is sitting on a ammo box.  It was very important to me to find two old boxes to use.
        I found two real nice ones in my Uncle Lester's garage which he had collected from
 my fathers store "Campbell's Hardware and Sporting Goods".  My father had a large gun store above the sporting goods store in Norwich Connecticut from the late 1940's till the 1980's.


       I completely tore them down very carefully not to split the old wood.                                                 Next I had to cut 3 inches off their height so I could fit my legs under the steering wheel.


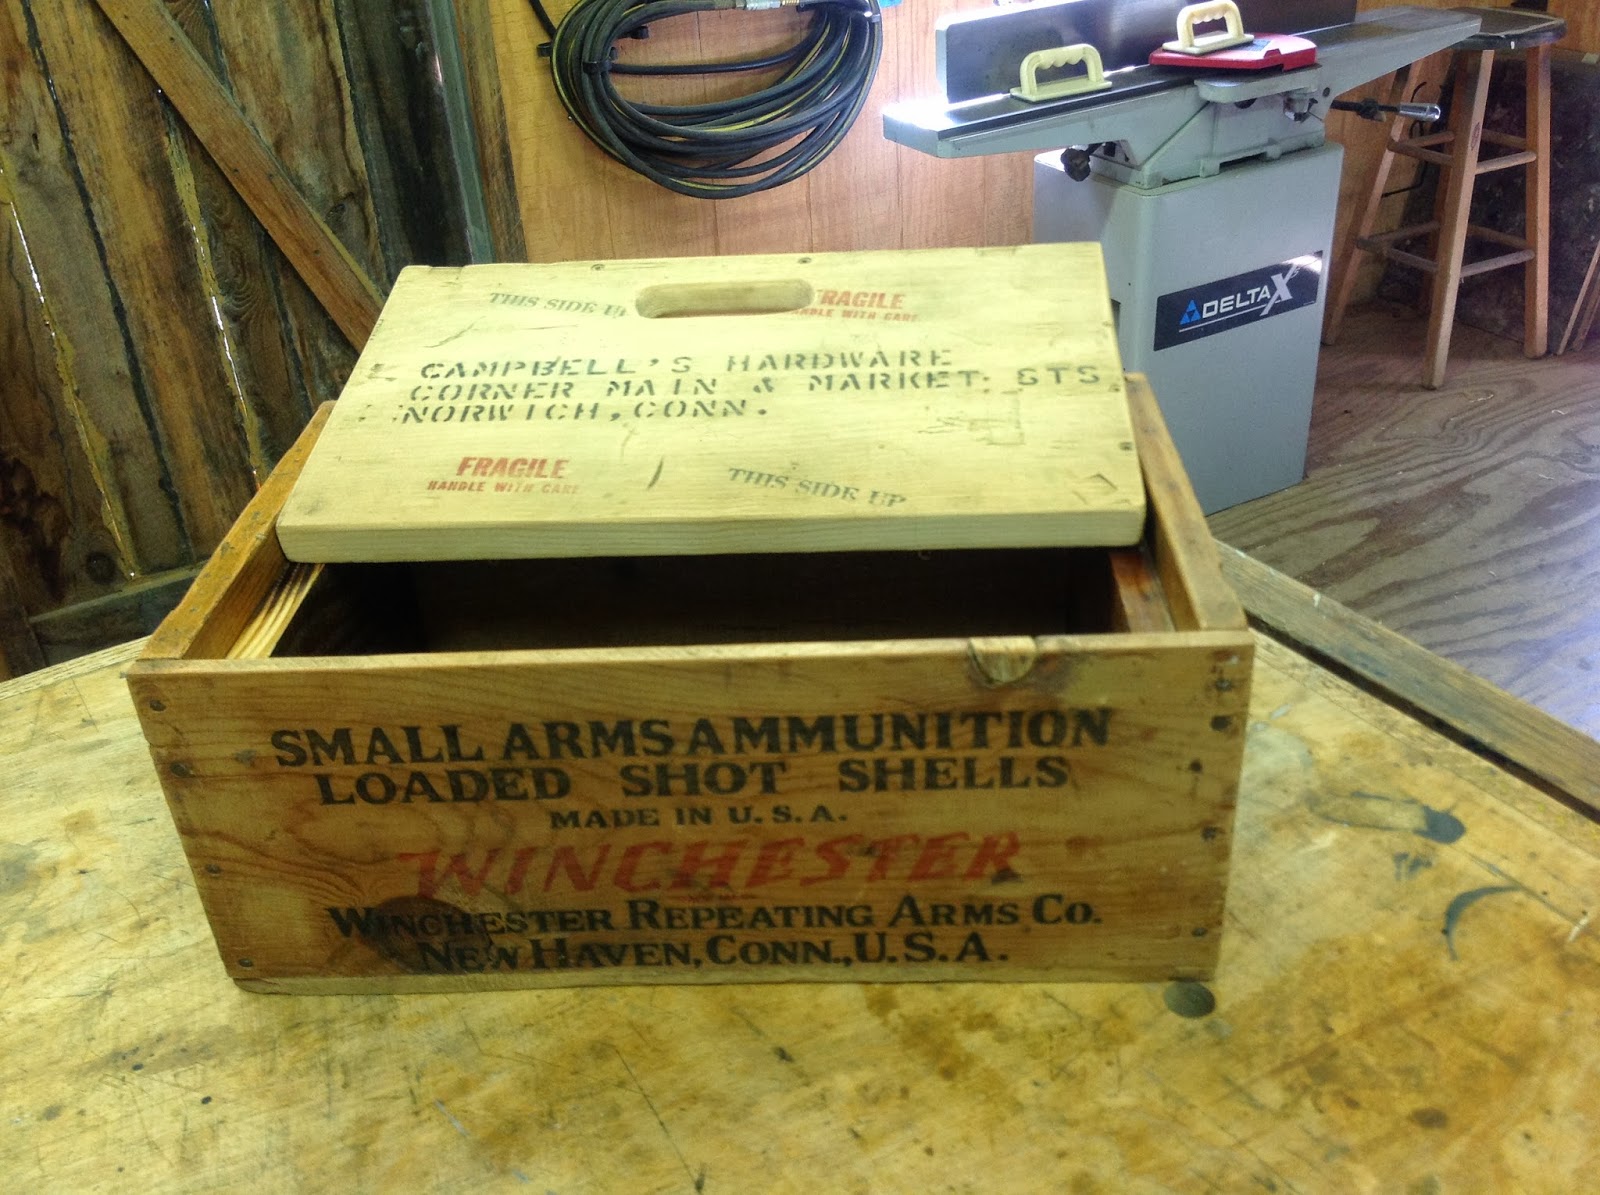
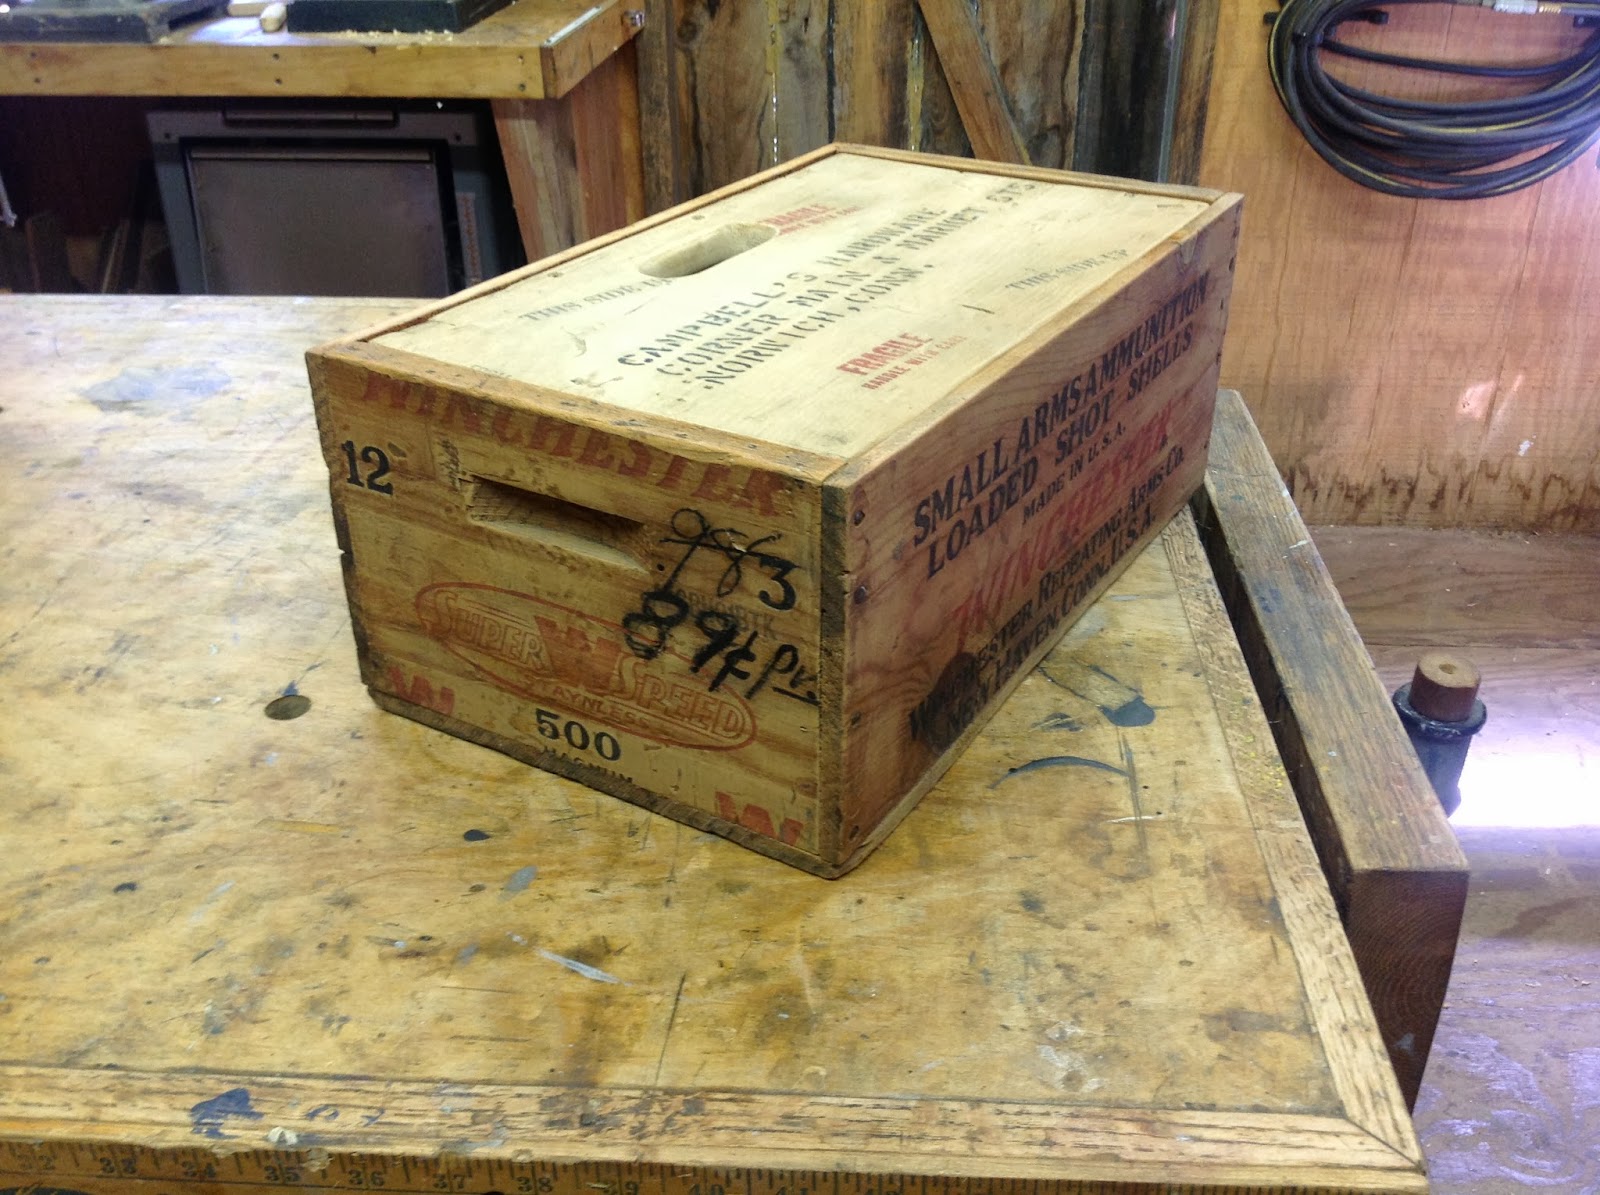
         I was very happy how they came out.  One is a Winchester box and the other a Remington box. I built inner frames so the lids would be flush and removable(for storage ) and rugged enough to hold my weight. If you notice I made sure I left the price of a box of shotgun shells my father put on with a grease pencil.  Marked down from .98 cents to .89 cents per box.  What a price!   In the 1960's my father was the biggest Remington gun dealer in Connecticut.   I can't imagine if he was alive today how upset he would be with this country and especially this state doing all they can to make life miserable for gun enthusiast's, hunters and collectors.
 After the wood frame was reinstalled, I refinished the boxes carefully not to remove any original printing and screwed them down only after I sat behind the wheel to make sure I could reach the pedals comfortably .  Yea, we are going for comfort thats for sure :)  May need to take a boat cushion when I head to the tractor shows next spring.


Note, my fathers store name and address still on the lids.
I collected original Model A Ford tools and grease gun and will display under the drivers seat.

Monday, August 19, 2013

Install of radiator,water pump ,etc.

This post is about installing the water pump, fan, and all the radiator hoses ,clamps , rebuilt generator and


mounting the radiator I bought two years ago at Hersey Pa.  It was an original that was recored.  That I was happy about finding.  I did not want a replica.  I read bad reviews about them leaking and not looking genuine.

Sunday, June 30, 2013

Installing the Cowl Assembly

     It's finally time to buff and polish, put on the moulding (molding(?) and install the cowl assembly.  This part of the tractor includes: the firewall, gas tank, and mounting area for the steering column and dashboard.


First step:            1.  wet sand the clear coat with 2000 sandpaper
                            2. machine buff out with rubbing compound
                            3.  rewash out compound, dry, then machine buff with swirl remover
                            4.  hand wax and buff - like every time I go to work on tractor now :)


Second step:       Install new cowl stainless steel moulding, patten tag on fire wall and new wooden body mounts that I made.


With the help from my brother-in-law Tom, we set the assembly on the frame and bolted it down.  Believe it or not, I was able to use the original 1930 carriage-style bolts with square nuts and washers.  With a wire wheel I was able to restore them to perfect condition.  I get a big kick out of being able to do that with the original hardware.


Saturday, June 8, 2013

Completing rear rims and mounting new rear tires

     After a few months of looking in 3 states for replacement split rims, I gave up, and decided to rebuild the old ones.  As you will see in the photos the originals were in real tough shape.  I spent over 40 hours cutting, welding, grinding in new sections, priming and then painting.  I had my friend Rick help me mount 2 new "Lester Balloon" 700x20 tires, new liners and tubes that I bought on line out of Pennsylvania.

     The bolts, nuts and special "Jaxson" clamp washers that hold the rims to the wooden spoke wheels were very, very hard to find.  I finally located them from an old time La Salle wheel rebuilder in Oregon.

     Finally, with all four tires mounted, the frame is now down on the floor.  For the first time in 2 years, the Model A can actually roll around!


Monday, November 12, 2012

The mounting of front new tires, rims and hub caps


Well as you can see in the original picture of the tractor, the red flyer has a thin, blue, 16" tire, late 1940s rim (with tan stripes) and a chrome small Ford hub cap. You can see by the new pictures, I have redone them exactly how they were using the original tire design.  The brand of tire is "Lester's", which I purchased in Hersey, PA.  I sure like the original look.

Sunday, October 14, 2012

Restoring the front and rear rims

                  When my father gave me the tractor it had late 1940s solid 16" ford rims on the front with thin tires.   The rims were navy blue with two thin tan stripes encircling the small chrome ford hub caps.  When I was a kid, I took them off and threw them in the family dump (that's against the law today to have a family dump) and put on some big fat "mud dogs" with flat black rims.  To return to how it was when my father gave the red flyer to me, I found two rims at a tractor show here in Hebron. After having them sandblasted, I primed and painted them navy blue and before clear coating painted on two thin tan stripes.
                    Now the back rims were a completely different story. They are late 1920s LaSalle wooden spoke rims. They were painted with many coats of red tractor paint.  I stripped them with paint stripper and revealed the wood spokes and decided to polyurethane the wood.
                    After many coats of primer and lots of hours of water sanding, now the rear rims are looking great with new red paint and 3 coats of polyurethane on the spokes.  Even my wife, Marie, helped me out untaping the wooden spokes.